Before you start a new year, please make sure that your teacher and class details are correct.
It is important that you follow these steps in the correct order, please do not skip a step - however, we may have completed steps 1 to 8 for you to save you time.
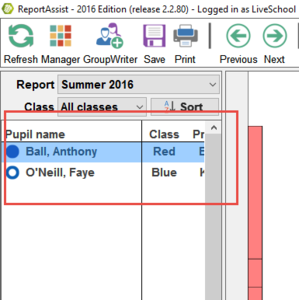
If the report name above the pupil list appears up to date and the actual pupil list is empty then please start at step 9.
1. Make the current school year 'inactive' by clicking Admin>Pupils and then 'Mark as inactive'.
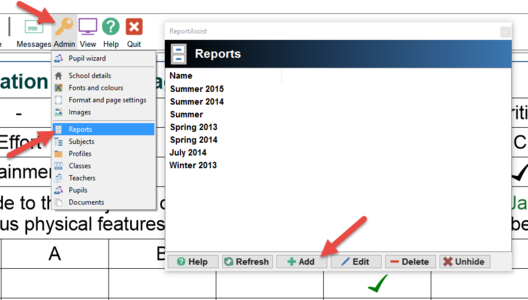
2. Make a new report by clicking Admin>Reports and then 'Add'.
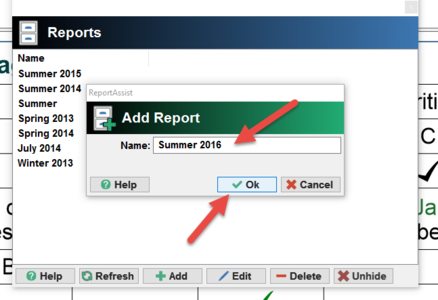
3. Name the new report, eg Summer 2020, July 2020, 2019/2020, etc then 'Ok'.
4. Notice that the report is still set to the current report and the pupil list is empty.
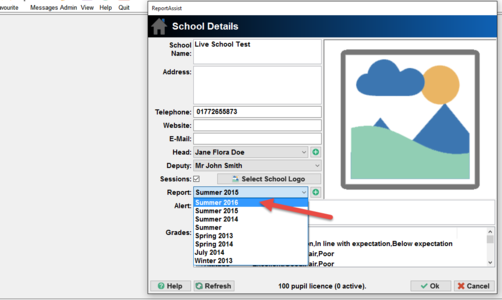
5. Clicking Admin>School Details and notice that the default report is still the current report.
6. Update the default report to the one you created in steps 2-3.
7. You will be asked if you are sure you want to change the report, click 'Yes'.
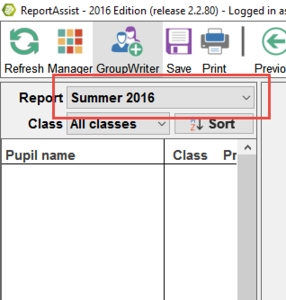
8. Notice now that the report is now set to the new report in the main part of the program.
9. Now we need the latest pupil list...
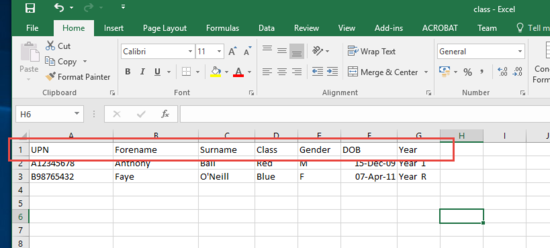
Create (or ask someone to create) a CSV for your current pupil roll, it should have the headings 'UPN, Forename, Surname, Class and Gender' (optionally you can add DOB and Year columns).
Important: You should double check that line 1 of the CSV file has the column titles and that the data looks correct before you import it into the program by loading it first into Excel or some other spreadsheet program.
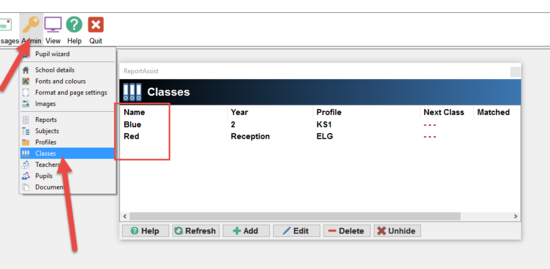
10. Double check that the class information in the program matches the names in the Class column of the CSV file, if a class is missing or has changed name then add or edit it.
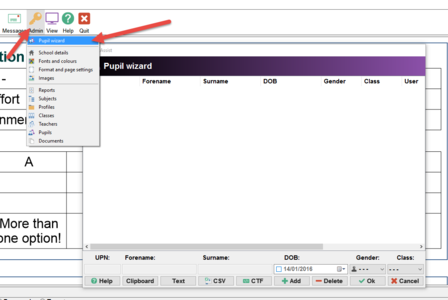
11. Now start the import wizard by clicking Admin>Pupil wizard.
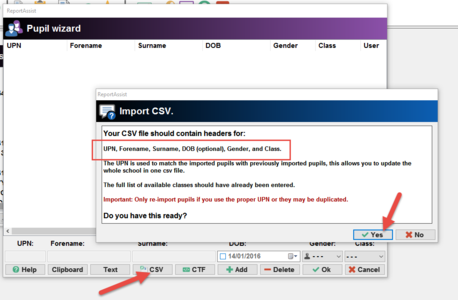
12. Click CSV (or CTF if you use a CTF file, the process is similar). You will see some instructions as to what the file should contain. Click 'Yes'.
13. A file selector will appear, once you have picked your CSV file the program will display how many pupils were imported. Notice that the class information is displayed.
14. Check that the class information is correct. If you see '- - -' then the class for that pupil was not found in the list of classes (see step 10) you should cancel the import and either add/edit the class in the program or in the CSV file. Then try again from step 11.
15. Click 'ok' to start the import process, it will add or update each pupil until all the pupils have been imported (this can take some time depending on how many pupils you are importing).
16. After importing notice that the pupil list now has a new set of pupils. You are all set to start writing your reports!
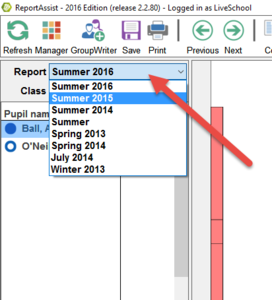
17. To see past sets of reports just use the drop-down menu above the pupil list.
This guide is also available to download in Pdf format.

